Checking that a portable extinguisher is visible and accessible at its assigned point
Check the sign, access space, and extinguisher separately at the same location. Record the obstructed side so the next round can find it.
Match the sign to the extinguisher
On a shift round, the extinguisher sign high on a pillar may be the first thing you see. Follow it from the direction people normally walk. A front-on photo cannot show whether someone approaching from the other side can see it. If there is another approach around a corner, check whether the sign and then the extinguisher come into view. Note the direction you were facing if the sign is on another face of the pillar.
If the sign is still up and the bracket is empty, record that exact point first. Moving the next extinguisher over can hide the vacancy and create one elsewhere. Tell the fire safety team which marked point is empty and ask whether the unit was removed for inspection or replacement. If temporary provision is needed, arrange directions people can actually follow.
A new workbench or moved partition can hide the sign while the extinguisher stays in place. Ask operations what stands there during work, since an empty morning aisle may look different. Report whether the sign is behind a bench or obscured only while loads are turned at the pillar. That helps the team find the activity causing the obstruction.
When the sign and unit are on different faces, verify which unit the sign refers to. A sign on the same pillar may point elsewhere. Match a photo to the assigned point and describe the approach for the next shift. If the assigned point has changed, notify the team that maintains the location information.
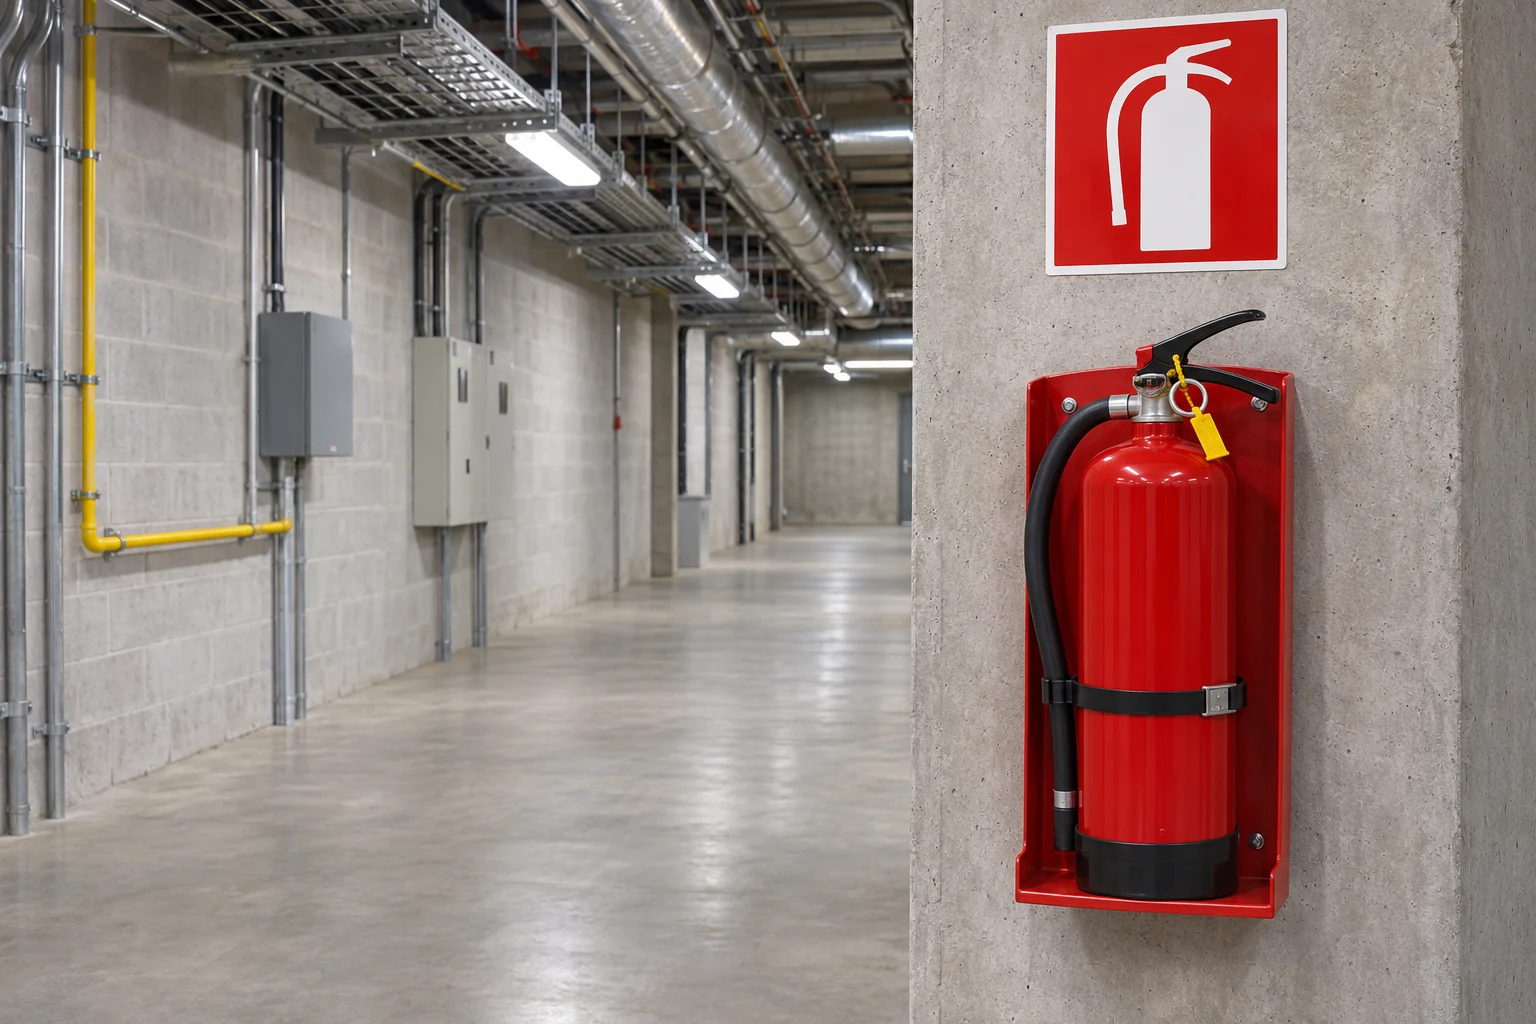
- Sign: check whether it is obscured from the aisle.
- Safety pin and seal: report visible displacement or damage.
- Hose: record visible displacement or damage.
- Bracket: look at how the unit sits and at visible mounting changes.
Check the space to turn and reach
Check visibility and physical access separately. A cart can block the side you need for the handle even when it is not directly below the unit. Look at the footing and the space needed to turn in front of the bracket. Where handling work uses the aisle, observe from a safe position after the movement finishes.
If boxes build up during a job, clearing them once may not last. Show the crew where they block access and identify an agreed staging point. Check pedestrian routes and access to other emergency equipment before choosing where the items go. Moving them across the aisle can simply recreate the problem.
If a large machine or unstable load blocks access, do not try to push or pull it away on your own. Report the item and the blocked approach from a safe position so the team in charge can arrange removal. Mention which side is still clear. A colleague who was not there should be able to locate the affected area from the record.
At a corner, check the inside and outside approaches separately. A wall-mounted unit can be obvious from one side and screened by stored items from the other. Record whether the whole approach is blocked or only the space to reach the handle. That identifies what needs clearing and where to verify the result.
Record what you can see on the unit
With the extinguisher in place, look at the handle assembly and body separately. Check for visible changes to the safety pin or seal, a bent handle, or dents and corrosion near the bottom. Record even a small mark with its location so it is not confused with a nearby unit. Leave the unit in place if the mark is difficult to see from the accessible side.
On a unit fitted with a hose, see whether the hose end has slipped from its holder into the aisle. Report where any visible cracking or kinking appears. Leave the hose and safety pin in place during the visual check. Specify whether the observation is at the handle assembly or at the hose end so the fire safety team can find it again.
If a gauge is fitted, record what can be read visually. Some designs lack a gauge. If glare or an obstruction prevents reading, record that and let the fire safety team identify the type and the appropriate check. A visible gauge indication is one observation among several.
If the body sits crooked in its bracket, distinguish visible movement of the bracket from a unit that looks displaced. Keep clear and alert facilities promptly if touching it could make it fall. Separate photos of the bracket and unit help identify what to revisit after repair or replacement.
Handover sequence
| Stage | Owner | Decision or check | Record |
|---|---|---|---|
| Locate | Round checker | Match sign and assigned point from normal approach | Pillar face and approach |
| Check access | Operations and round checker | Check footing and reach separately | Item and blocked approach |
| Observe | Round checker | Separate visible body, pin, seal and hose findings | Part and extent observed |
| Route action | Fire safety and work crew | Separate vacancy, defects and obstructions | Owner and open items |
| Recheck | Round checker and facilities | Recheck both presence and access from the same direction | Point and result |
| Hand over | Operations | Confirm temporary provision and unresolved obstructions | Available location and open checks |
Separate vacancies, access issues, and equipment defects
Keep three observations separate: whether the unit is at its assigned point, whether people can reach it, and whether it has visible defects. The unit can be present while a bench blocks access, or the aisle can be clear while the bracket is empty. Combining the findings into one line makes it easy to close the whole issue after fixing only part of it.
Send vacancies and equipment defects to fire safety, and material obstructions to the crew or operations team responsible for the items. When both are present, record what each team needs to verify. A replacement unit does not resolve a blocked sign. Set the check at the same location and look at both the provision and the obstruction.
When told the work is complete, return from the same approach used during the round. A front-on replacement photo may leave the other approach unverified. After relocation, check that the old sign no longer leads people to an empty point. Include a fixed landmark such as a pillar or frame in the photo so the point can be found again.
This round covers everyday access and observable conditions at the assigned point. Article 18 of the occupational safety rules requires emergency equipment to be maintained for easy use. Check the applicable fire standard for provision and signage according to the premises and applicable date. Fire safety staff verify equipment type, installation suitability, and replacement against the applicable requirements and product information.
Leave a record the next shift can use
Distinguish a close-up from a view that shows the surroundings. A close-up can show a dent but may not identify which of several identical units it belongs to. Add a view with the pillar face or nearby door and note the safe observation direction.
If the checklist has one field for both location and condition, distinguish the findings in the note. When the unit is present but one approach is screened, mark that approach as unverified. The next shift can then prioritize the unresolved area before repeating the whole round. Agree who will look once it can be safely checked.
When an obstruction recurs, the item name alone rarely explains it. Ask whether it blocks access on arrival, during work, or afterward. If mobile equipment blocks the point whenever it is repositioned, walk the approach with the crew that sets it up. Distinguish operating and staging positions so each shift can keep the same area clear.
For a replacement, first confirm which location it addresses. Nearby equipment and signage issues can easily get the wrong photos attached. Compare landmarks, then revisit the point and check presence and access separately. Keep a remaining obstruction open even after recording the replacement.
In a shared area, agree how to keep the space clear across shifts. Show the incoming shift the space and explain why it is needed. If relocating the unit is proposed, refer the assigned-point decision to fire safety. Share the confirmed location so different crews do not send people to different places.
Maintenance or painting screens can change access. Ask the crew how far the screen will extend and recheck where the sign is visible from the aisle. If temporary arrangements are needed, fire safety staff should coordinate both access and directions and check restoration afterward.
Track temporary provision and restoration separately
When a unit is removed for service, the team that collects it and the team arranging temporary provision may differ. Confirm which point is vacant and where people are being directed. Verify the temporary directions and replacement unit from the normal approach before closing the item.
If one of two approaches is blocked, record both the open and blocked sides. A photo of the open side can obscure an issue that persists during work. Report the direction and work conditions seen, since approaches can differ on the same round.
Where photos cannot be taken, describe the aisle junction or pillar face. Note the approach and what obscures the point so it can be distinguished from nearby equipment. Ask separately when and under what conditions any point inside the work area can be checked.
A wet or slippery floor can affect access to the extinguisher. Do not step onto it to test the condition. From a safe position, see whether the wet area overlaps the space in front of the unit and tell operations. Recheck the route from the sign once the floor issue is resolved.
Before an aisle closure, check whether the extinguisher will lie inside it. If it does, have the work crew and fire safety staff coordinate access and directions. After reopening, remove temporary directions and verify that the assigned point is accessible again.